Wednesday, November 14, 2012

DIY: 6 Foot All Wood Desk

When you have the kind of man I have {oh so patient} he deserves a project created just for him! I own half {3/4ths} of our Craffice {Craft/office Room}. We had the computer on a small drawing table and it wasn't cutting it. He was jealous of my giant crafting table. It's from Ikea, it was $30, no big deal I told him we'll get you one too. Uhggg drive a year to Ikea and end up buying other things I don't really need... {Read: I was just there and they are remodeling} So I went to my favorite place a mile from my house, which by the way was either a great idea or a terrible idea... Home Depot. I actually went for screening material because ours were torn and the landlord wouldn't do anything about it, but you crafters know how that goes!

Here's what I ended up creating!


Kept it all natural- Added some verbage and finished it off with a coat of polyurethane.


He's half way through with his Master's in Business Leadership and deserved a creative space of his own, thus my quote choice! --Proud of him!


Kurt walked past the Craffice and said "Oh, I love you! You bought me a table!!!" Upon further investigation a bigger smile spread across his face and he said, "You MADE this didn't you! you MADE me a table. Are you kidding me!?" Ha best response I've ever gotten from one of my projects!! <3


--ZZB

Tuesday, November 13, 2012

DIY: Shutter Component Holder

Welcome to Zigzags, thanks for stopping in... if you've visited a few times you know I LOVE pallets, if you haven't well now you know -- I love pallets. I also LOVE shutters. A friend of mine gave me a bunch of shutters she had hanging out in her garage--what a gift!!! Oh the juices that started flowing! 
I used them for wall art on a wall that had been annoyingly empty for months! It made me smile. Then we packed up and moved to Phoenix... had to get creative again....
My pallet love attempted to be clever and simple to hold all our components after we mounted the tv to the wall. NO. It just looked messy. Plus Cooper-our doodle has an amazing obsession with putting his ball somewhere he has to struggle to get it out of. We found 5 balls under it in under a week of it sitting like this...lol. He's special ;)


So I started thinking huh maybe I could use those shutters to hold the components... and somehow utilize them in their original function. This idea was brilliant in my head! In actuality what I thought would just fall right together, well it fell right apart! {Took forever and required more hands than God blessed me with}

I planned out what I thought would work and then went to town. I'm not going to give you step by steps exactly, but I will try and explain the best I can. Its tricky when you just roll with the dilemmas and forget photos once you get frustrated.

I used two wider shutters for my front and back sides, 4 of the smaller widths to create the top and bottom. This will be visible in the final photos. Then I had one shutter that had fallen apart and all the slats were out. So I cut it down to the width my end pieces would need to be.

Instead of visibly connecting the smaller ones to create the one large one I used the dowels that came out of the broken shutter :) Drilled a hole in the opposing shutter and hammered them together. I did this on each end and in the middle for more strength. 


Now I had my 4 pieces to create my rectangular box and had to decide how to attach them to each other. And I couldn't have hollow ends so I re-crafted the slats that had fallen out by cutting them down to the height I needed and carefully tapping in a little nail to act as my dowel. Then I glued them into the pieces I had cut to size for the ends. 


Of note--almost everyone of these shutters "fell apart" in this process. I should have added wood glue to each piece and let them dry overnight before I proceeded--Impatient. So instead of being patient I got to put the slats back in 800 times--- A VERY FRUSTRATING PROCESS! Thus the not enough hands part- thank you to my partner in crime for saving me from tears a time or two!

Oh and my clamps-wonderful $3 purchase :) They were one of those I don't need these now, but I should certainly have them on hand purchases-- Paid off!


Take a peak inside on that far shutter I used a 1"x2" piece of wood to drill the back onto the top and bottom. You can also see my sides here too. I used the smallest nail I could to attach the ends on, plus wood glue. 


I removed one of the slats in the back so I could weave in my component wires. 


Components in place. I don't love it sitting on the speakers. But it's this way for 3 reasons. 1. At that height it covers the wall plug perfectly 2. The front shutter hangs lower than the rest, so it can't sit on the floor 3. It's high enough Cooper can't hide his balls under there :) Mom wins! I hope to eventually achieve a floating look when we own our home, but for now it sits like this. 


Favorite part:  I totally forgot to mention that front shutter... how did it go on you ask?! The small shutter on the front top still had its hinge pins and the front piece still has hinges so it just slid right on. Now I can hide the components and still open it to put in my movie! Bonus since I used shutters the remotes work for the hidden components too!!


Total Cost: Shutters-Free, Nails-had them, Glue- had it, Clamps- had them, 1"x2"- had them
FREE-My favorite

I LOVE this project and once again these darn shutters bring a smile to my face everyday! Thanks Pam for gifting them to me.

What do you think?!

--ZZB

DIY: Side table

Why buy it if you can build it/sew it/repurpose it....?! That's the theory I go with, with almost everything.. pretty sure it annoys 75% {maybe more, but they've kept quiet} of the people that shop with me 

Check out the side tables I made in a day. Inspiration: searching site after site of side tables. All I wanted was simple, functional and inexpensive. 

I chose the sizes I wanted them, sketched out my concept on paper, measured, and cut. Some of my favorite projects are made with 1"x2"s and 2"x2"s!


Then started drilling-predrill your holes for quicker building/less splitting. 


For the top I used 3 boards to create 1 pushing them tight, to not have any space for stuff to fall through. I also added a shelf with 1"x2"s--it needed the shelf for stability plus if you weave your charger through it or tie it to it its not constantly falling on the floor :)

Then SAND.


Add your favorite stain-use a wood conditioner for a more even color. I finished with a furniture polyurethane for shine. 


They are perfect and well loved :)

--ZZB

Saturday, November 10, 2012

Long Maxi Skirt + a Train

I bought this fabric well over a year ago. It jumped right into my cart--It is so not my norm in a pattern.  I saw a long maxi skirt/dress pinned and thought "Oh, I have the perfect fabric for that!" I intended to make it just like the tutorial, but didn't have quite enough fabric. So....

Introducing My Long Maxi Skirt + a Train


The back has a train-like effect--which is my favorite part! You can't tell by the photos, but it isn't sewn all the way down, it has a slit that goes about a foot up.


Wear it low with heels....

Wear it high-folded over, with flats. I like it with a wide belt when I wear it like this...


How to: *Note: please read through and look at the pictures before starting. I just started going without a plan, so you may read through and think of a better way to do it--totally fine with me :)

1. Fold your fabric in half--trim it up. I used a stretchy cotton-no fraying= no hems :)

2. Cut off a 6 inch section-making sure one short end is your folded edge. 


3. Decide how much of the waistband you will need for your waist. Give room for seam allowance and remember if your fabric is stretchy as mine is you will need it smaller than you think. I pretended and put it around me how I would want it to fit and then marked it there. Cut off the excess.

3. Fold your strip in half long ways and center it on your skirt portion. Line it up with the edge of your skirt rectangle of fabric. You should have pattern up on both pieces with the folded edge aiming at the bottom on your fabric. In other words the part that opens should line up with the shorter edge of the rectangle. Think the waist is smaller around than the length of your skirt. Use a tight zigzag stitch {or a serger- I have one but haven't mastered it} and sew the 2 pieces together. 


4. Once you flip up the waistband, it should look like the pic in step 5.

5. Sew ONLY the waistband edges together!! Right sides together. Ignore the part of the skirt that flaps out and doesn't have a waistband connected to it! See below


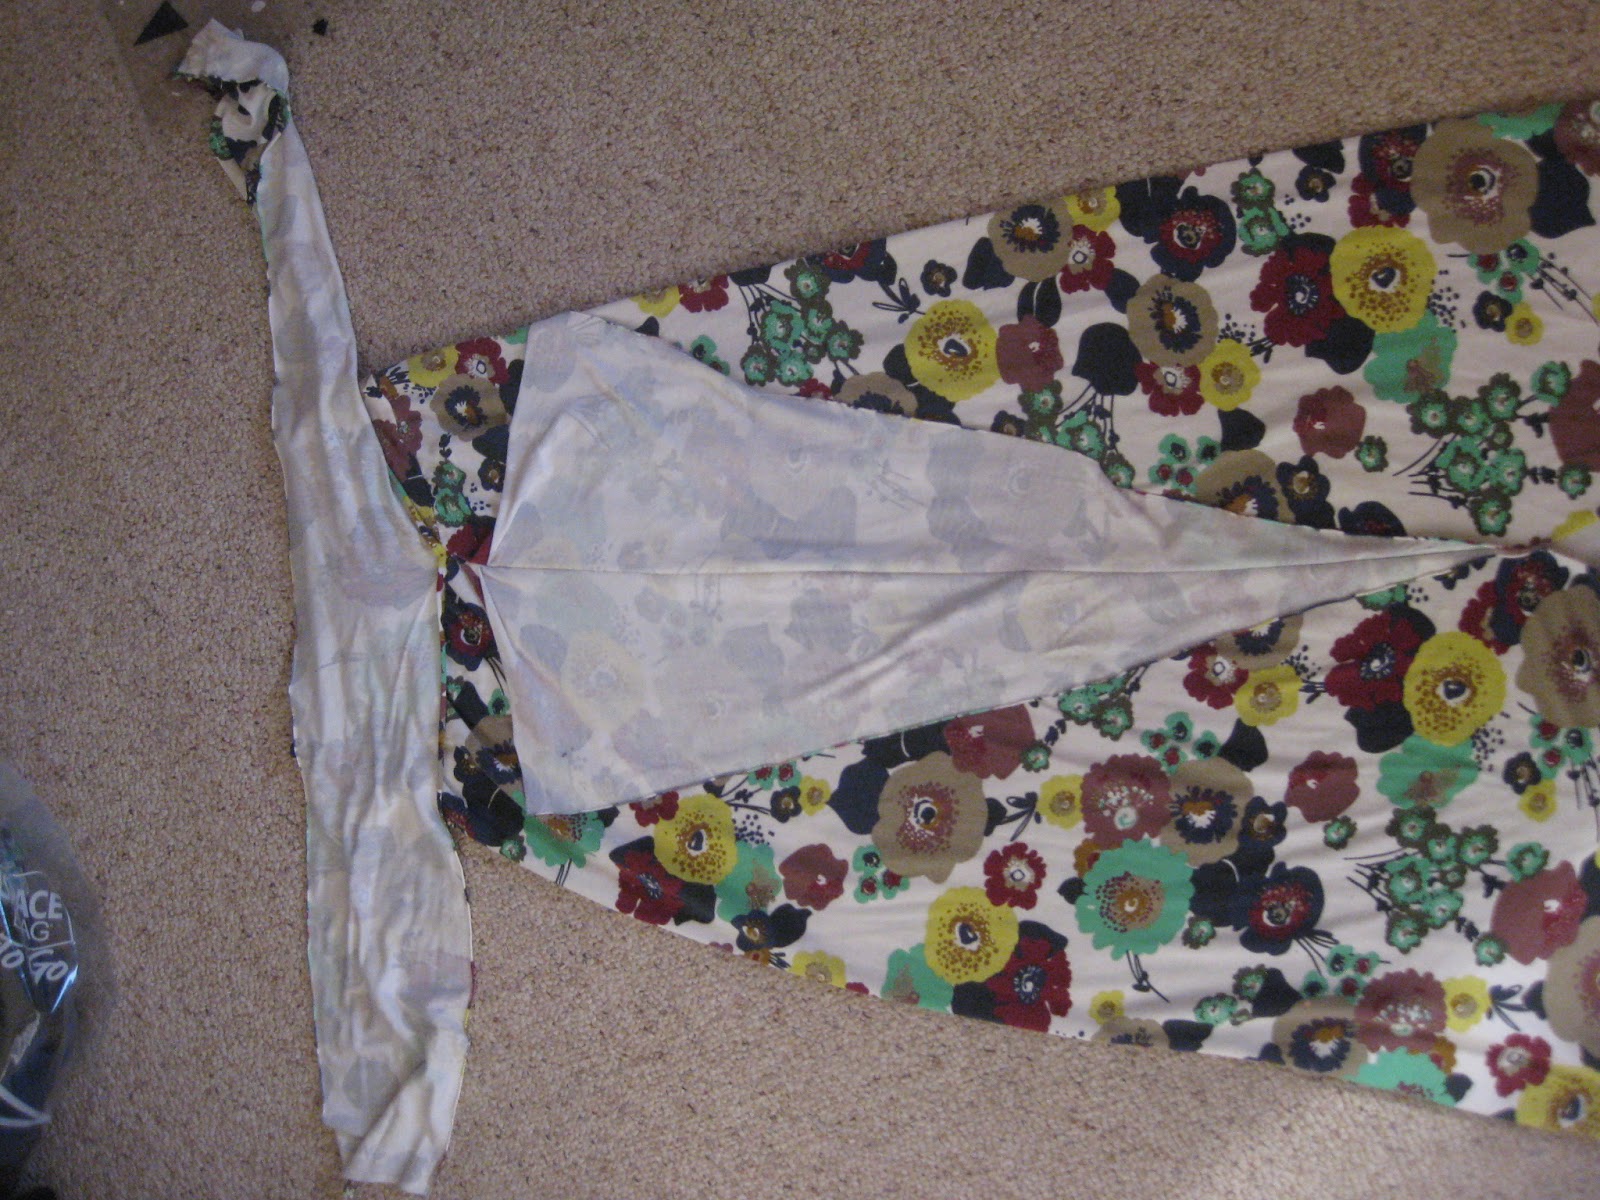
6. To make the train part: Lay your skirt out-like the above photo, with the new waist seam on the edge, like the picture. Looking at it now your should have what looks super awkward. You have the waist part of a skirt with flappy edges that are not connected to anything and you're thinking I screwed this up! You didn't. Stay with me and breathe :) AND get some pins out! 

7. Starting where your waist band is sewn together pin down at an angle toward the bottom of the skirt. Like the angle you can see in step 5 where I have the flaps open.  Leave an opening at the bottom also shown folded over above-if you choose not to it will be difficult to walk in, unless you started with more fabric than I did thus an overall wider skirt. 

8. Sew down this edge with the wrong sides together. Where your waist seam is and your new stitch connect is an odd spot (if you're a sewer you probably have a way better solution for this, but I will tell how it worked for me.) I just kindof made a pucker.. by folding down the top edges just a hair. You will have a little hole where the waistband and skirt meet ignore it and sew straight down your pin-line, back stitch at the bottom.


9. K Let's fix that hole! Flip it inside out and sew the pucker from the reverse meeting your previous stitch line. 

10. Now that pucker's ugly and you have a wimpy train. Take your left over piece of waistband and line it up with the skirt's waistband. I put mine slightly off center so that the flaps hang differently.


11. Sew this part on just above the pucker, right along your waistband/skirt seam. I did a one inch stitch and went back and forth a few times. 


YOU DID IT!! Try it on!!! 

If any parts are too long just trim it off. I rounded the bottom corners a little bit so I wouldn't step on them. I get compliments on this skirt every time I wear it and because its such a colorful pattern you can really mix and match with your top!


Total Cost: $3

--ZZB
P.S. This was even confusing to write, so please leave me comments to help with my tutorial skills and answer any of your questions :)

Cheap DIY Wall Art

What can you do with all those boxes you get on your monthly {weekly} trip to Costco?!

Cheap wall art!

Check it out. I took 3 matching boxes from the giant cart of boxes at Costco...


Decide where you want them on your wall--they are so light you just need a little nail to keep them up, use two a few inches away so they don't get crooked on you. 

Get some burlap or really any textured fabric and wrap it around the box. Use hot glue or super glue to attach it. I used duct tape in there too to hold while my glue dried. I also used a spray adhesive on the front of the box and sides to stick the burlap to my box before wrapping it around.

Paint on your desired design! I chose fruit because I hung these in my kitchen. I used quick big brush strokes and wanted the strokey not solid style. I also picked fruit of similar colors so I could save $ on buying paint. 


I really love my probably $6 wall art--Hope you do too :)

--ZZB

Rolling Chalkboard Pantry

Do you have a big pantry with a pretty glass door that has "pantry" engraved in it?? I do not, but I have always dreamed of one. In every place I've lived aside from my childhood home I've yearned for such a pantry. Our current house has a big closet in the hallway which is around the corner and behind the refrigerator wall. Not exactly convenient for cooking. Not only is It in a different zip code it has deep shelves- gah annoying! We buy in the bulk bin section, so the shelves are a sea of plastic bags filled with oatmeal, flax seed, pasta..... Don't even get me started on hunting for spices! I do have some baskets for them, but all in all I was convinced there had to be a better solution. 

Insert creative idea.

That awkward space next to the fridge where the broom gets lost + some Pinterest inspiration evolved into my new chalkboard pantry. I followed the concept outlined on Classy Clutter, but added my own twist. I painted the backside and edges of the pantry with chalkboard paint. Now not only do I have space for my spices and no misused space next tot the fridge, but I can write recipes or to do lists, use the board for game night scoring or write a little love note to my guy. I love the functionality.


{I didn't paint this beautifully because only I see it open and I am impatient-one day it will get more paint!}

^^The only detail still in the configuring is how to avoid the top bumping 
the fall I think I will stick on a longer piece of felt along the entire edge^^

What have you done with awkward spaces?!?

~~ZZB

Thursday, November 8, 2012

Creating.....Muscle!

In the baby stages of this blog I told you my goal for 2011 was to do p90x and post my after pictures. Well if you have followed me since then you know I busted my butt...maybe twice. Check that off as not accomplished.

I'm not a big girl, I don't have weight to lose. When I moved to Phoenix I knew no one, I hung out with my pups and waited with excitement for 6:01, knowing Kurt was off and headed home! No where in there was working out and I could feel it. When you don't have weight to lose its very apparent when you have gained even a little bit. So in June after our second move to a vacation home on the east side of Phoenix I received a livingsocial deal in my email for Rock Star Boot Camp. For $20 I could go for an unlimited month and it was 5 minutes away. Hmm I pondered it for only a few moments and pushed BUY! SO outside my comfort zone. Go workout with a group of people and not bring a friend with me!? I knew I needed a reason to leave my house everyday, aside from work and I didn't have a craft room in this house, so no trips to JoAnn's.

I did not take before pictures or measurements because I didn't think my body would change...that much! Well it has! I have been going to RSBC since June and love it! The workouts are a new challenge every day and I continue to see muscles that I have never seen before. I have abs, for the first time in my life. I have more confidence in who I am inside and out. And every time I leave my  comfort zone to go to camp I am surrounded by people that want the same things: to be their absolute best! Most of us are signed up for the Spartan Race and would really like to conquer every obstacle thrown our way!!

When I first started this journey the owner said, "you don't need to lose weight. We need to CREATE muscles!" I LOVE creating and I love that he chose that word to describe my journey. :)

We just started a 12 week challenge. This time the photos and measurements have been documented. I already warned Curtis, the owner, if I lose anymore in my cup size I'm going to have to reconsider this whole burpee hell!! 

The take home: Be creative in every facet, it's more than what you do with a paint brush or a sewing machine it's about creating YOU.

--<3 Melissa Delight