The inspiration Pinterest provides me on a daily basis, whether for this year's
Halloween Costume or just an
every day project, fuels passion and creative juices like none other! Well antique stores help too!
I LOVED this lace skirt
tutorial I found on pinterest. For months I hunted the aisles of lace at JoAnn's whenever I went for a "visit." They never had the *perfect* lace. Then a friend from work introduced me to SAS a discount fabric store here in Phoenix!! They had a whole wall of lace in every possible color and in tons of different widths. Pending on the width the price went up. The lady who rang me up measured extra nice so my lace was half off. I just rolled with it ;) Until I needed more and that guy measured correctly and in no way cared that I had previously gotten it for $0.25 a yard! Boohoo--ok $1.50 more I can do that lol
So I initially bought 10 yards of lace, bought 5 more and used maybe 3 of it.
What you need:
Lace-- pending on your chosen width-mine was 2.25"
Fabric to sew on to which becomes your skirt base-I used one of my guy's old white t-shirts {It had pit stains so repurposing it was a wonderful idea}
Thread
Step 1: Use a pencil skirt that fits you. Lay it on top of your desired base fabric and cut around it. Now, I cut it slightly larger than the skirt to have room for a seam allowance, but thought the t shirt would stretch a little like this skirt does, but once I added the lace it no longer stretched...just food for thought.
The other bonus of using the t-shirt is its already double layered which saves you time.
I left room at the top to have the ability to fold it down and have a soft waist band.
^This was me just testing out how much lace I might use. ^
Step 2: On a cutting mat lay one layer of base fabric out. Begin pinning your lace at the bottom edge. And then pin each strip every one inch-
adjust this pending on your lace-I cut as I went along over hanging it a little bit in case when sewn I used more than I thought given the t-shirt can stretch. Do this all the way to where you want the top to be + a quarter inch for folding over -
you don't want the base fabric to show so you will be folding the lace over a quarter inch.
Step 3: Repeat with second layer.
^This shows you the 1 inch overlap^
^My shirt was extra long so I cut off what I didn't want leaving about an inch for the fold over^
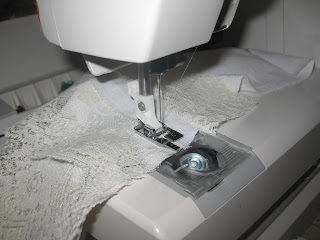
Step 4: Sew the strips on. I used a zigzag stitch to ensure I caught the edge. This will also help avoid the stitch breaking if your skirt is tight when you put it on.
Zigzags do not break while a straight stitch will! I started my sewing at the bottom moving on up just as I had pinned the lace on.
^Your stitches don't have to be perfectly straight just close!^
Step 5: Roll your top over on each piece and sew it down so that only a quarter inch of lace shows on the back side. You could sew down the bottom part of the waist band, but I did not. If you do this make sure you move your front lace out of the way.
Step 6: Lay your lace sides together- if you measured 1 in apart the lines should match up almost if not exactly perfect. At this point I trimmed my edges, so I had a straight line to work with when sewing the two pieces together.
Step 7: Sew them together- I again used the zigzag stitch. IF you want a zipper in one side you need to do that now. Zippers are still scary to me, so my advice would not be helpful. Take a deep breath, watch a youtube video or two and Go for it!! You can do it--you can only get better!
TOTAL Cost $6.50 and about 2 hours :)
I love this skirt!! It's a wee-bit tight making it not appropriate for every setting, but for the right event its great!! I think I may wear it to my cousin's engagement party this weekend-now to figure out what to pair it with, maybe a blazer!?!
Send me a pic of your new skirt!
<3 ZZB


,%202008,%20c-print%20(web)_1.jpg)


